Vegetarian eating is becoming more and more popular these days— even for Thanksgiving. Eating this way in many cases is less expensive and can be extraordinarily delicious too. It’s also good for the environment as Mark Bittman nicely elaborates in his book The Food Matters that eating fewer animals is healthier for all of us.
Personally, I am still a meat eater. But I eat less meat as I get older, especially less meat fed with antibiotics and I feel better in the process. Still giving up turkey on a national holiday is not easy to do, especially when we have become habituated to this style of eating since childhood.
But small steps are easier to take if we begin to see the health benefits and the potential appeal of eating more greens and beans and grains as well. If we present such food options to our families plated in a fashion that is more beautiful to look at, then it’s likely they will become more delighted with a meal that is colorful and flavorful as well.
The first time I ever ate a meal at an all vegetarian restaurant, many years ago, was in San Francisco at Greens at Ft. Mason. Their chef, Deborah Madison, had also written a cookbook by the same name. I think it was probably the first gourmet vegetarian cookbook I had ever seen.
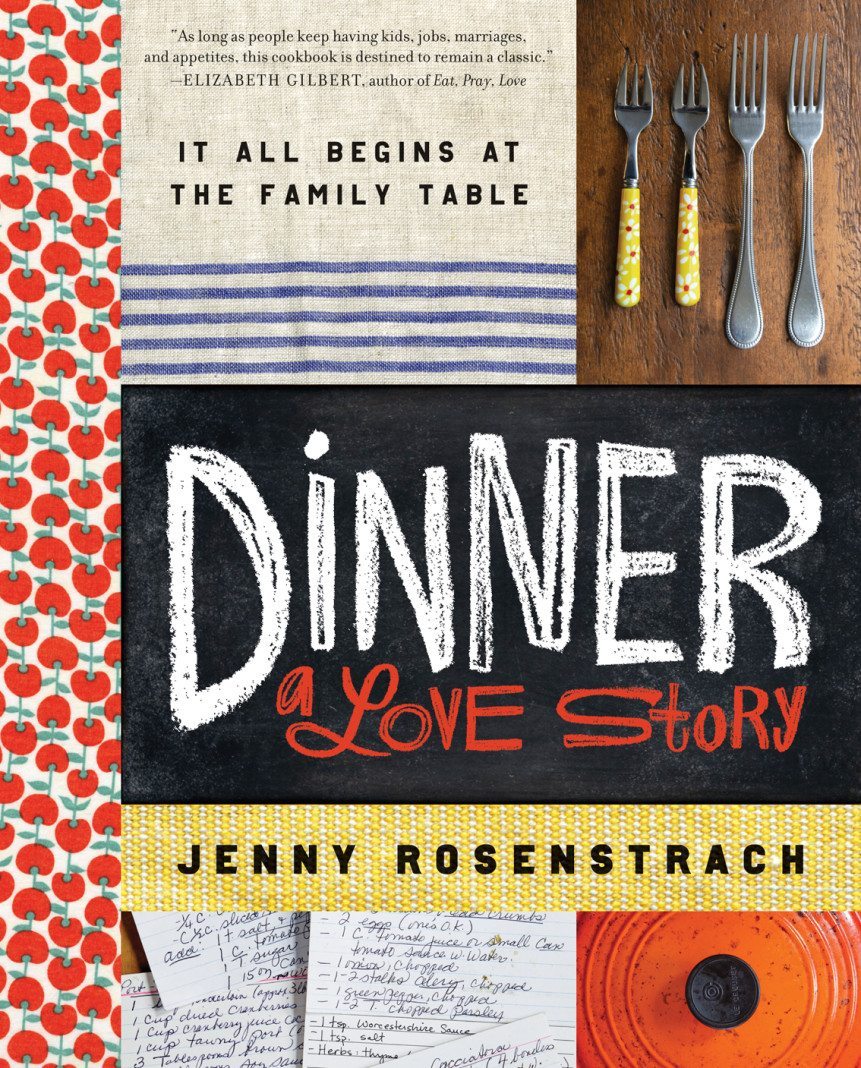 In contrast to the ever popular Moosehead Cookbook published on the East Coast, Madison’s vegetarian cuisine was presenting us with a West Coast alternative. This was not merely counter culture cuisine, but food that was delicious, gourmet and high end. At the same time it seemed like a return to home cooking that was healthier than ever. (See Jenny Rosenstrach’s Dinner: a Love Story.)
Thanksgiving is a time to experience these changes and to enjoy the numerous food options that vegetarian cuisine offers us. Our holiday table will be enhanced as we become aware of how vegetarian dishes improve the quality of our lives.
There are 3 Thanksgiving courses below. Cheers and Bon Appetit.
______________________
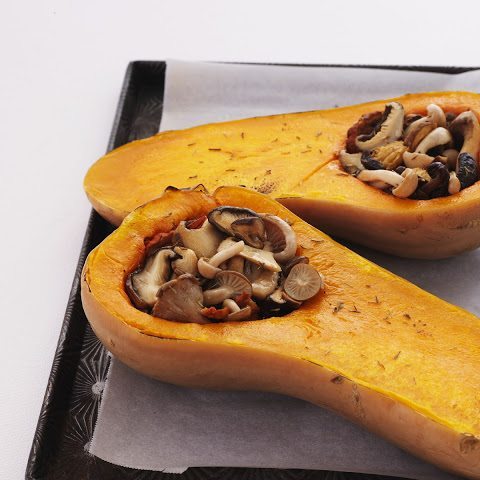
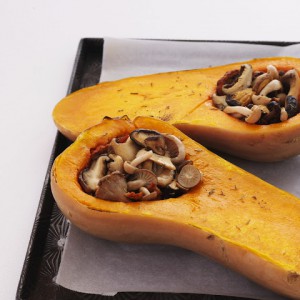
Entrée Roasted Butternut Squash dressed with Wild Mushroom Ragu, Vidalia Onions and Fresh Herbs
Serves 6 to 8
2 lbs. butternut squash, cut in half and deseeded
16 oz wild mushrooms, carefully wiped clean. Washing them is not necessary and can affect the taste. Choose dry or fresh mushrooms such as porcini; shitake; oyster; Chanterelle; cremini; black morels; and Hen of the Woods.
1 medium-size Vidalia onion, diced
4 cloves garlic, diced
½ cup parsley, chopped
3 branches or 2 tsp marjoram, diced
3 oz unsalted butter
3 Tbsp extra virgin olive oil
Carmelized balsamic vinegar for flavor and decoration
½ cup hazelnuts, chopped
1. Remove the “leg” of the squash from the bowl, cut vertically in half and then cut each half into four slices leaving 8. Next cut the larger end of the squash with a bowl in half, remove the seeds and pulp, turn upside down and lay them in two inches of water in a hotel pan. Also place the other 8 slices of squash in the water.
2. Steam the 2 squash bowls and the slices cut from the leg of the squash in the water for 30 minutes at 400F until the flesh is soft—testing to see if they are soft by inserting a toothpick into a squash bowl and into one of the slices cut from the squash leg.
3. Remove the bowls from the hotel pan with tongs and cut each bowl into quarters. Place the 8 slices on a sheet tray and roast until the edges are slightly blackened at 450F for 20 minutes. Do the same with the rest of the 8 slices of squash leg. Set aside.
4. Hydrate the “dry mushrooms” in a medium bowl of hot water for 10 minutes. Remove these mushrooms, rough chop them and set aside. Strain the broth and save the broth that is left- eg.2-3 oz
5. Clean the “fresh mushrooms” with a clean paper towel. Remove the stems, discard and chop the mushroom tops into nice crisp slices—about a ¼-inch wide and set aside.
6. Sauté diced onions in a large, 10-inch sauté pan with 1 tbsp oil until soft but not brown.
7. Add half the chopped mushrooms to the onions into the same sauté pan with half the butter and half the remaining oil. Sauté at medium temperature adding half the aromatics including the garlic, parsley and marjoram until soft. Remove to a large bowl off the stove. Repeat with the rest of the mushrooms, butter and oil and aromatics, and then combine.
8. Add the broth that was used to hydrate the dried mushrooms to the sauté pan and reheat all the mushrooms at medium to high temperature for 4 TO 5 minutes.
9. Finish preparing your mushroom ragu with the juice of ¼-½ lemon, salt and pepper to taste.
10. Plate 3 slices of butternut squash, one cut from the bowl and the other 2 cut from the leg of the squash. Add 2 tbsp of mushroom ragu on top with a small squeeze of lemon on each. Drizzle the carmelized balsamic vinegar over the mushrooms and around the plate.
11. Place 1 tbsp crushed hazelnuts on top of each plate of mushrooms and roasted butternut squash slices.
______________

Cranberry Chutney
Yields 6 cups
1 bag cranberries
½ cup currents
1 Tbsp vegetable oil
2 cups chopped red onion
1 Tbsp minced garlic
1 cup granulated sugar
1 cup white vinegar
1 cup water
2 Serrano chile peppers, seeded and diced
1 tsp sea salt
1. Heat oil in a medium-size pot over medium heat. Add onion and cook, stirring occasionally, until soft, 6 to 10 minutes Add garlic and cook, stirring, until fragrant, about 30 seconds.
2. Add fresh cranberries, sugar, vinegar, water, chiles and salt. Bring to a boil over high heat, stirring often. Reduce heat to medium and simmer until thickened, 30 to 40 minutes.
3. If freezing or refrigerating, pour the chutney into canning jars to within ½ inch of the rim. Wipe rims clean. Cover with lids. Let the jars stand at room temperature until cool before refrigerating or freezing. Or process in a water bath to store at room temperature for a longer time. Go to eatingwell.com/kitchentips.
__________________
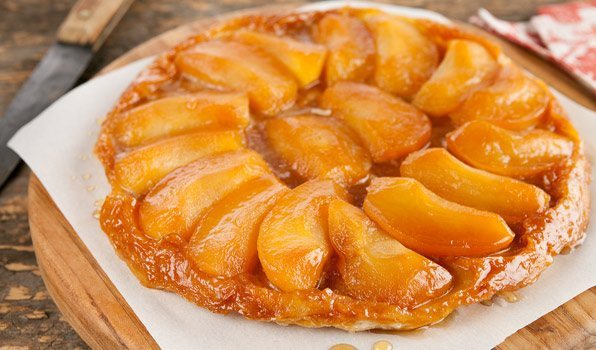
Tart Tatin
Serves 6 to 8
3 Tbsp butter
¾ cup white sugar
3 large Granny Smith apples—peeled, cored and quartered
1 Tbsp all-purpose flour
1 9-inch unbaked pie crust (see below)
1. Preheat oven to 425F.
2. Coat a 10-inch oven-proof skillet with butter. Sprinkle sugar evenly over the top of the butter.
3. Place apple quarters, rounded sides down, on top of the butter and sugar in a circular pattern.
4. Place skillet over medium-high heat and cook until butter melts and sugar dissolves and begins to caramelize. Continue to cook until apples soften and caramel begins to brown, 10 to 12 minutes. Remove from heat.
5. Sprinkle work surface with flour and roll a “pie crust disc” into an 11-inch circle. Pinch edge to create a ruffle around crust. Place crust on top of apples and tuck in edges around apples.
6. Bake in the preheated oven until crust is golden brown, about 20 minutes. Allow to cool for 5 minutes. Place a plate over the top of the pan and carefully invert to release tarte from the pan. Scrape any remaining apples stuck to the pan back on top of crust.
7. You will need to make a pie crust disc to finish a tart tatin. There’s one on line that uses a food processor to cut the butter into the flour which is pretty cool. Or use another you like.
First Published in www.longislandweekly.com by Alan Zox.
Contact Chef Alan with questions or comments at azox@zoxkitchen.com